Dragonfly BSD. One very secure operating system.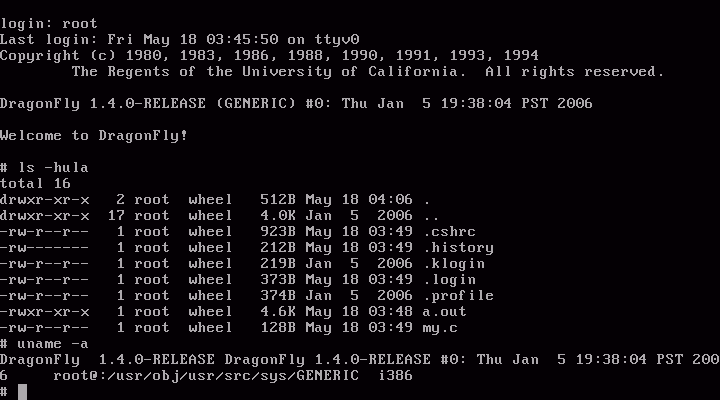 This is running in qemu, the emulator for PC operating systems. It is a live CD and has the option to install the operating system or use the system as root. Once logged in you can use gcc and vi, all the familiar UNIX/GNU tools. I could get to like UNIX if it was easier to install. But it is better than Windows and much more fun to have a quick hacking session with. And that is good for the soul. If only SCO would go away and leave it alone. But there is also the macintosh but that is with a graphical interface abstracted from the underlying OS. Just a good looking toy, but without knowledge of the internals the users just us the point and click interface they rely on. But Dragonfly BSD has no point and click interface, just a simple root shell when running from the CD.
I am writing this page to put out some simple tips on securing your GNU/Linux box. Now let us get on with it.
I was setting up my OpenSuSE 10.2 system to use the KDM login manager and it would not let me login. I found out it was the fact I had compiled and installed bash version 3.2 as my shell and I had not added it to the /etc/shells file. Something to watch out for, and although I was still able to login at the text console I think this trying to give some security which is admirable, but does not
go all the way at all. But this shows what can happen if you are not careful. Having a password on the grub bootloader and sensible passwords on your user accounts will go a long way towards greater security. And make sure you use Blowfish encryption on your passwords as this gives the best encryption. There is a section on password protecting the grub menu file below.
Password Protecting your Grub menu file.
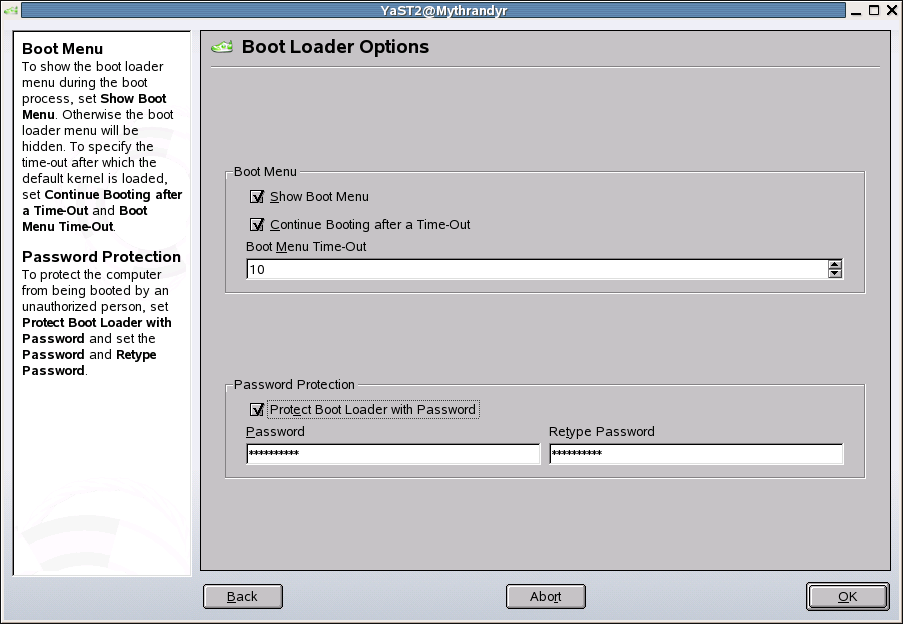
Here is a simple example of putting a password on your Grub menu file. Very good for security. Fedora Core 5 lets you set this up during installation, but I am using SUSE 10 as an example. Using the Yast setup tools.
color white/blue black/light-gray default 0 timeout 10 # Password: ff64302c password --md5 $1$BB3Frzzz$ks/5ciyxAazSumCMZVV961 title Linux 2.6.16 root (hd0,0) kernel /boot/bzImage root=/dev/hda1 vga=0x307 initrd /boot/initrd-Mythrandyr |
See the screenshot here for an example
using the SUSE 10 Yast tools.
Below is an example using the grub command line. I am using the password ff64302c as an example of a good hard to guess password choice. But since I have used it here, do not use it yourself. Once you have an encrypted password string, put in the grub menu.lst file as shown above and then you will need to press `p` at the menu screen and enter the password to adjust any options and the kernel command line. The encrypted md5 string below is different from the one above as it uses random encryption and this is pretty good security. And I have put the plaintext password in my menu.lst example just to show what the password is, NEVER do this yourself. And this would not protect you if someone boots from a Linux rescue disk as shown in the next article about resetting your root password. Unless your hard disk partition is encrypted. But encrypting the root partition is not the easiest thing to do.
GNU GRUB version 0.96 (640K lower / 3072K upper memory) [ Minimal BASH-like line editing is supported. For the first word, TAB lists possible command completions. Anywhere else TAB lists the possible completions of a device/filename. ] grub> md5crypt Password: ******** Encrypted: $1$px/dT1$LDLCLc1sQLSQCmULletqN/ grub> |
Resetting your root password in Suse 10.
If you have lost your root password in Suse 10.0 then all is not lost! Just boot from your SUSE 10 DVD and select the rescue system option, then login as root and type cd /mnt then type em>mkdir harddrive and mount -rw /dev/hda1 /mnt/hardrive then you can access the files on the hard disk. But we need to change the password, so type chroot /mnt/harddrive and then type: passwd root to change the root password.
Now you can type /sbin/init 6 to reboot and remove the CD/DVD and you will be able to login as root once again. I had to do a fresh installation of SUSE 10.0 and this happened to me when I set the password for root and promptly forgot it, so thankfully I was able to fix it. If only more Linux distros had such good rescue tools. You can use this method to affect many system settings if you accidentally fscked something up and needed to change the setting back. Using chroot, you set the root directory to the hard drive and can easily change the settings using the toolset available.
To make your system a little more secure, edit your /etc/hosts.deny file to look like this, and you will have a more secure system against port scanning.
# /etc/hosts.deny # See 'man tcpd' and 'man 5 hosts_access' as well as /etc/hosts.allow # for a detailed description. ALL : PARANOID ALL |
And add just this line to /etc/hosts.allow.
#/etc/hosts.allow ALL : LOCAL @localhost |
Now your system will be safer from internet attack. Not impervious without disconnecting from the Internet but still a little safer. Below is the result of port scanning my machine with nmap after these settings have been enabled. Type cat /etc/protocols | grep tcp for example for information on what some port is running. GNU/Linux has a command for everything!
bash ~# nmap -v -sS -O localhost Starting nmap 3.81 ( http://www.insecure.org/nmap/ ) at 2007-03-09 13:38 EST Initiating SYN Stealth Scan against knoppix.boxen (127.0.0.1) [1663 ports] at 13:38 Discovered open port 631/tcp on 127.0.0.1 The SYN Stealth Scan took 0.55s to scan 1663 total ports. For OSScan assuming port 631 is open, 1 is closed, and neither are firewalled Host knoppix.boxen (127.0.0.1) appears to be up ... good. Interesting ports on knoppix.boxen (127.0.0.1): (The 1662 ports scanned but not shown below are in state: closed) PORT STATE SERVICE 631/tcp open ipp Device type: general purpose Running: Linux 2.4.X|2.5.X|2.6.X OS details: Linux 2.5.25 - 2.6.3 or Gentoo 1.2 Linux 2.4.19 rc1-rc7) Uptime 0.706 days (since Thu Mar 8 20:42:50 2007) TCP Sequence Prediction: Class=random positive increments Difficulty=3625530 (Good luck!) IPID Sequence Generation: All zeros Nmap finished: 1 IP address (1 host up) scanned in 3.505 seconds Raw packets sent: 1679 (67.4KB) | Rcvd: 3364 (136KB) |
Setting the security level in OpenSuSE 10.2.
To do this, you run chkstat -set /etc/permissions.secure, this will enable greater security levels for your systems. You can edit the files with vim and adjust the settings in the files to suit. When I set the secure level I could not start Xorg when typing “startx”. Xorg did not have permissions to manipulate the /var/log files. So this needs adjusting. But this is a good way to improve security and there are no problems if you use gdm and boot in runlevel 5.